I started quilting in 2017 by taking a class at Patch Halifax. My graphic design brain was tickled by colours and patterns and geometry, and after years of working in tech, I was ready to make something REAL.
That 4-part class flipped a switch in my brain, and soon after, I became a devoted quilter. But… there was one step of the process that I dreaded. It was finicky, frustrating and the final step, so I wanted it to be great, and I was SO BAD at it. It was binding.
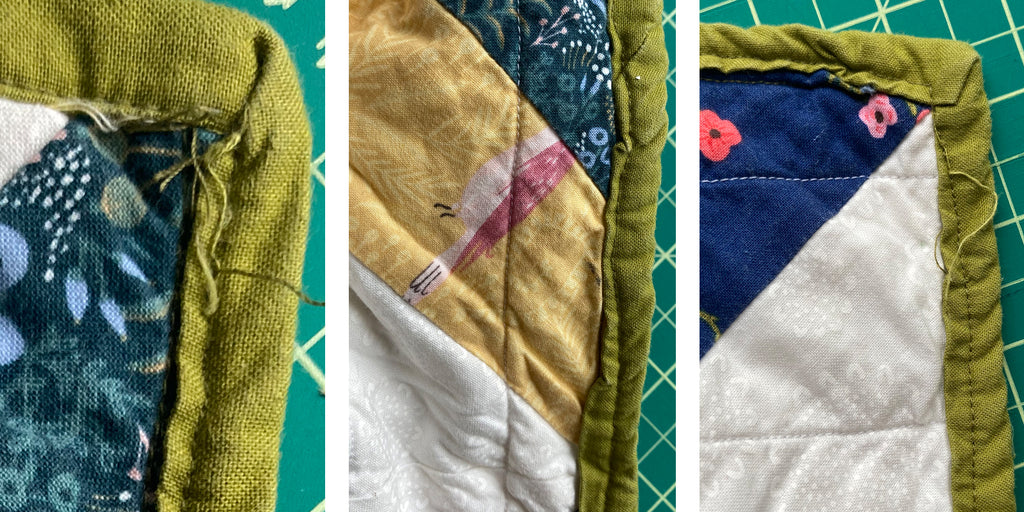
I’d like to take this opportunity to show you the binding on that first quilt I made, it’s a little rough. I was so proud of this quilt and I still use it today! So, I’ll start off by saying, your binding doesn’t need to be perfect. Five years later the crooked binding on this well-used quilt is still holding on.
Like everything else in quilting, you’ll get the best results by going slow and practicing each step. After making dozens of quilts and quilted products over the last 5 years, I’ve finally found the method that works for me. It’s important to give credit where it’s due, Brittany’s tutorial on her website Lo & Behold Stitchery was a massively helpful to me, so our methods are similar.
All my quilt and mini quilt patterns come with an illustrated binding guide, but in this post I’ll be using photos and some short video clips.
Here’s what you’ll need:
- Rotary Cutter
- 6” x 24” Quilting Ruler
- Cutting mat
- Binding Fabric (how much you need depends on the size of your quilt, more on this in Step 1)
- Straight pins
- Pencil/chalk/marking tool
- Sewing machine
- Measuring tape
Step 1: Find out how much binding your quilt will need.
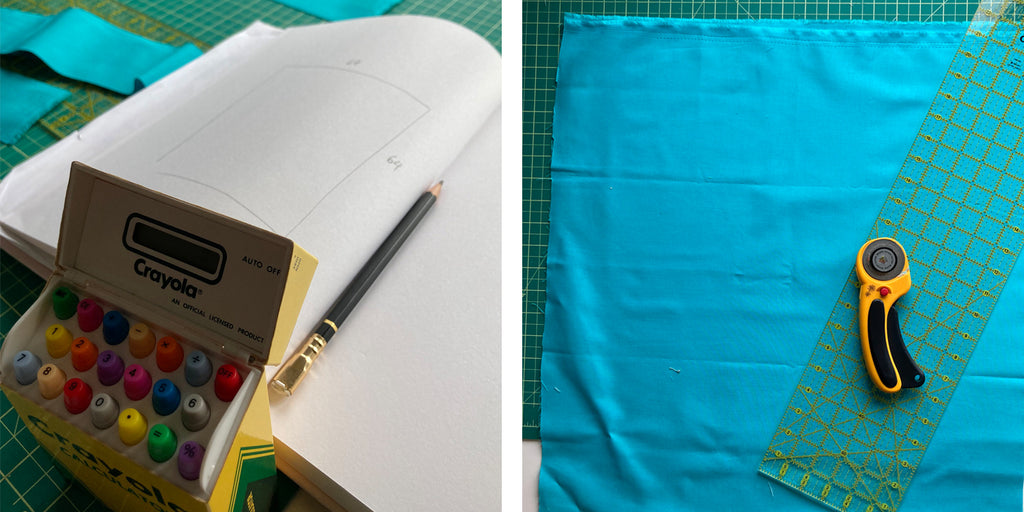
Measure each side of your trimmed quilt and add those numbers together to get the perimeter. The binding will need some overlap so I like to add about 18” inches to this for good measure.
In the example quilt I'm binding for this tutorial, each side is 64”, for a perimeter of 256”. Add 18” and that’s 274” of binding to make.
The binding will be made up strips that are 2.5” wide x width of fabric (WOF), which is usually about 42 inches.
To figure out how many 2.5” strips we need to cut, take 274 divided by 42 and you get about 6.5, meaning we need 6.5 strips of fabric to make up our binding. In this case, we’ll round up to 7.
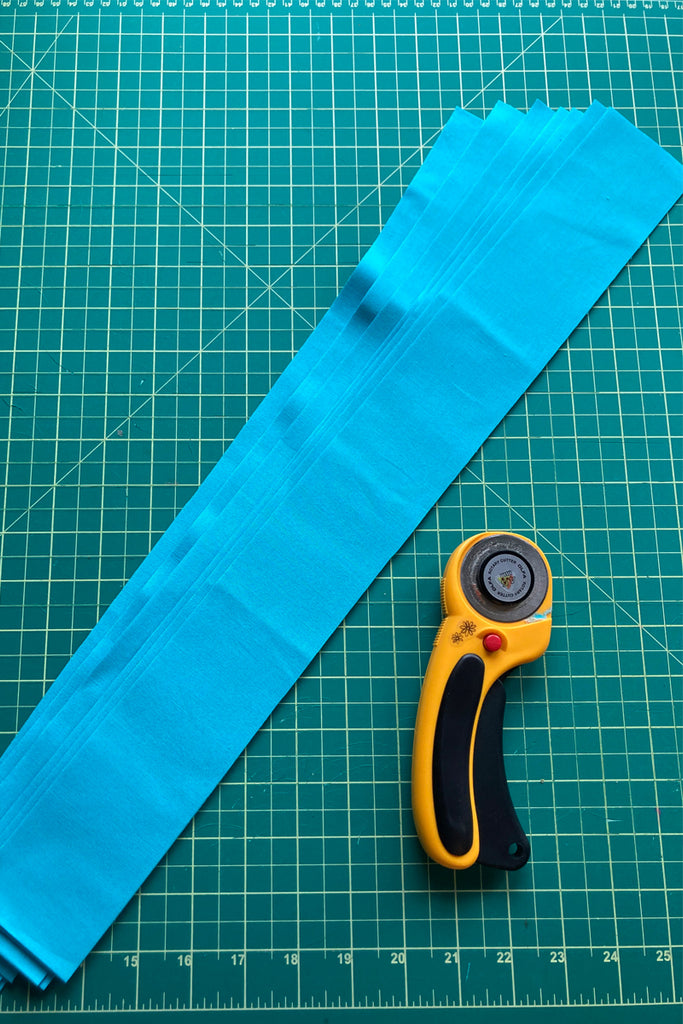
Now we know how much fabric to cut: 7 strips that are 2.5” wide.
Step 2: Piecing the binding strips together
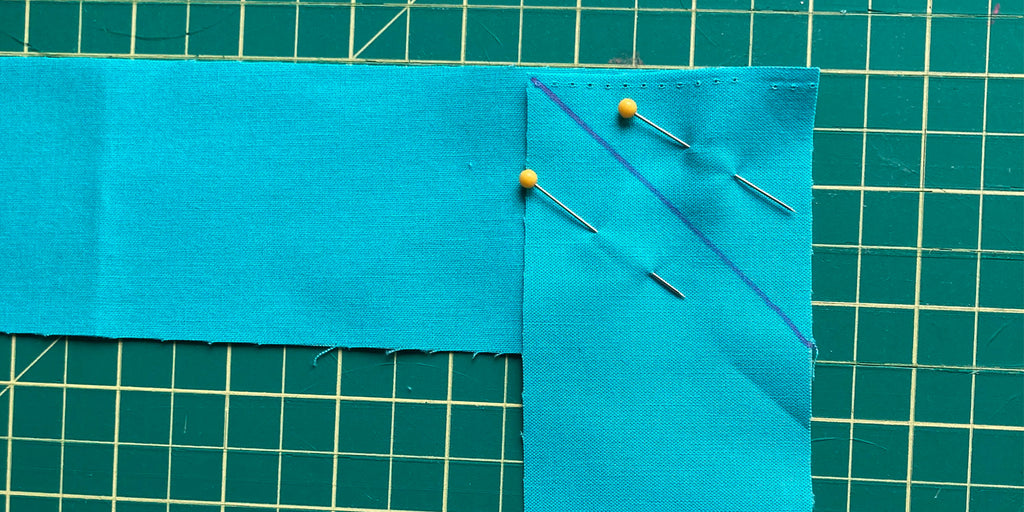
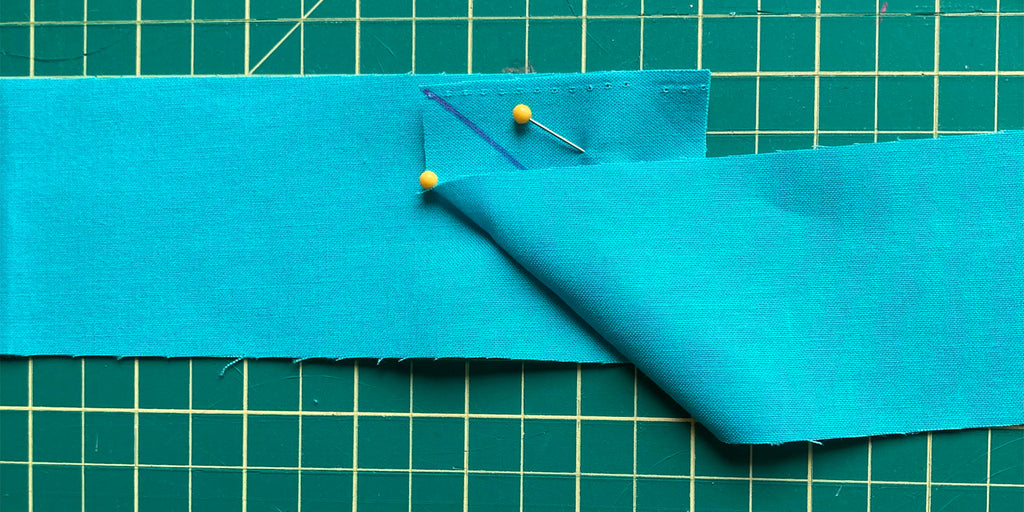
Place Strip 1 horizontally on a flat surface, then lay Strip 2 right sides together and perpendicular to the end of Strip 1.
Draw a diagonal line from the top left to the bottom right of Strip 2 and pin in place.
Step 3: Add more strips.
Arrange Strip 2 so it is horizontal with the right side up. This helps to visualize the length of the strip and avoid attaching something upside down.
Lay the 3rd piece of binding on top, placing it perpendicular to Strip 2 and right sides together. Draw a diagonal line from the top left to the bottom right of Strip 3 and pin in place.
Continue adding strips until all the binding pieces are pinned together to make one long strip.
Step 4: Sewing Strips
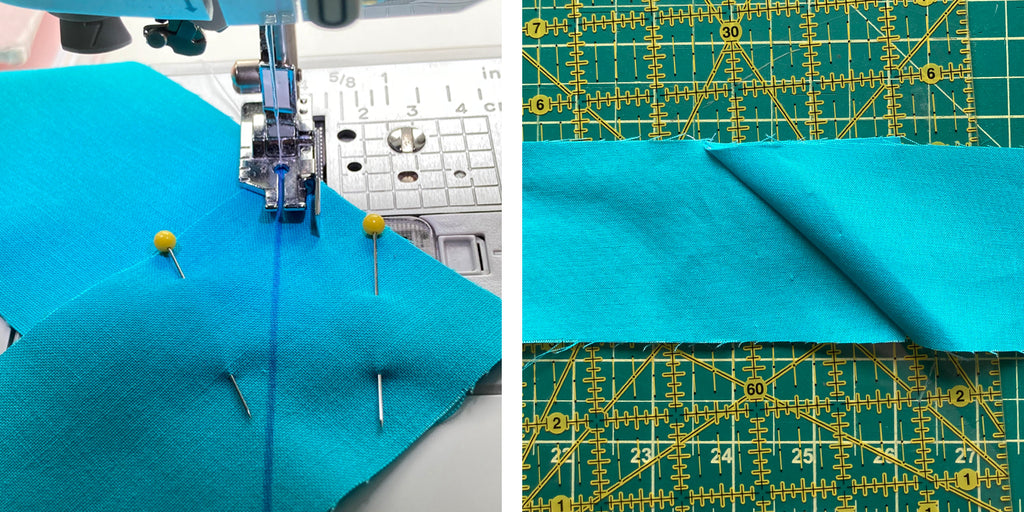
Sew the strips together following the lines you drew.
Step 5: Trim seam allowances
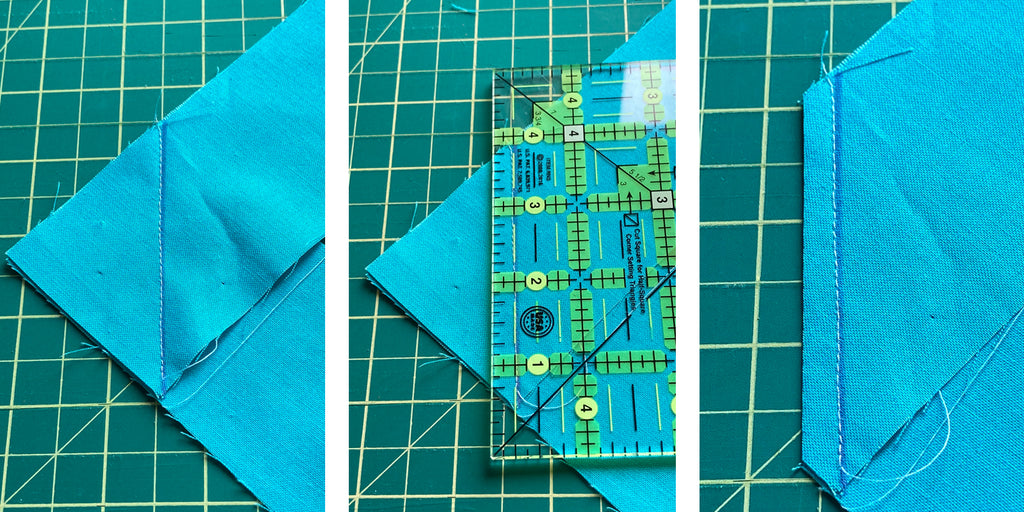
Trim the seam to ¼” and then press to one side.
Step 6: Press lengthwise
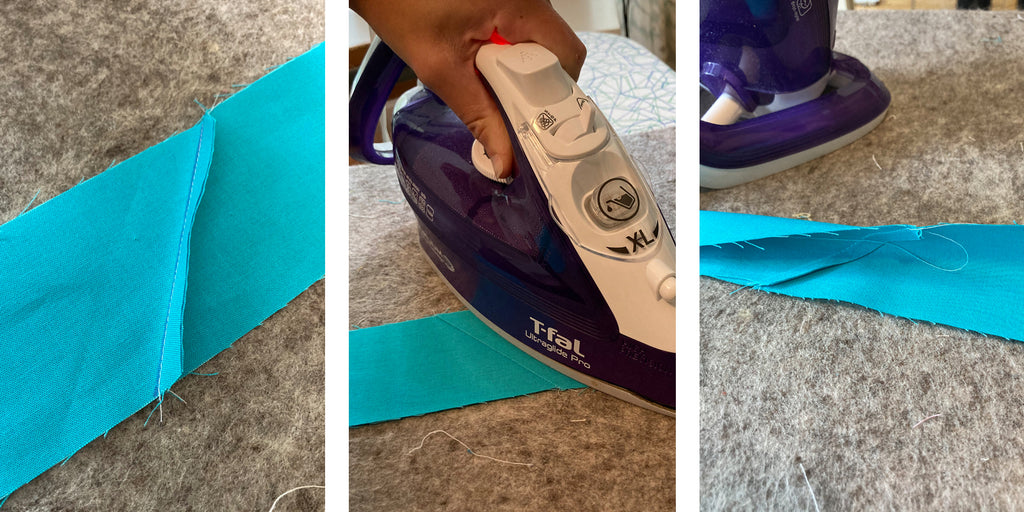
Fold the entire binding strip lengthwise and press. Your binding will now be 1.25” wide. It will also be overwhelmingly long!
Step 7: Attaching the Binding to Your Quilt
Lay out your quilt on the floor or a large table with the patchwork facing up. Line up the raw edge of your binding with the raw edge of the quilt anywhere on the edge. Lay out the binding around the quilt, avoiding seams on corners. Adjust as needed. Make sure you have enough binding to go all the way around the quilt with lots of overlap at each the ends (around 12-18").
Step 8: Pin the tail on the quilt
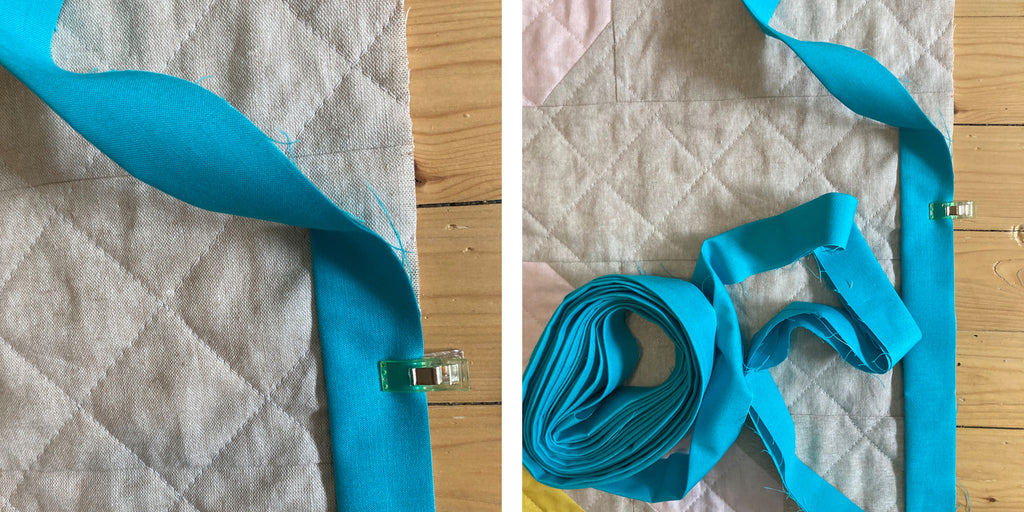
Pin the binding in place with one pin about 12” down from the tail of the binding. You don’t need to pin all the way around, just mark a starting point, making sure you have a long tail of extra binding. Roll up the rest of the binding so it doesn’t get tangled.
Steps 9, 10 and 11 are shown in this photo:
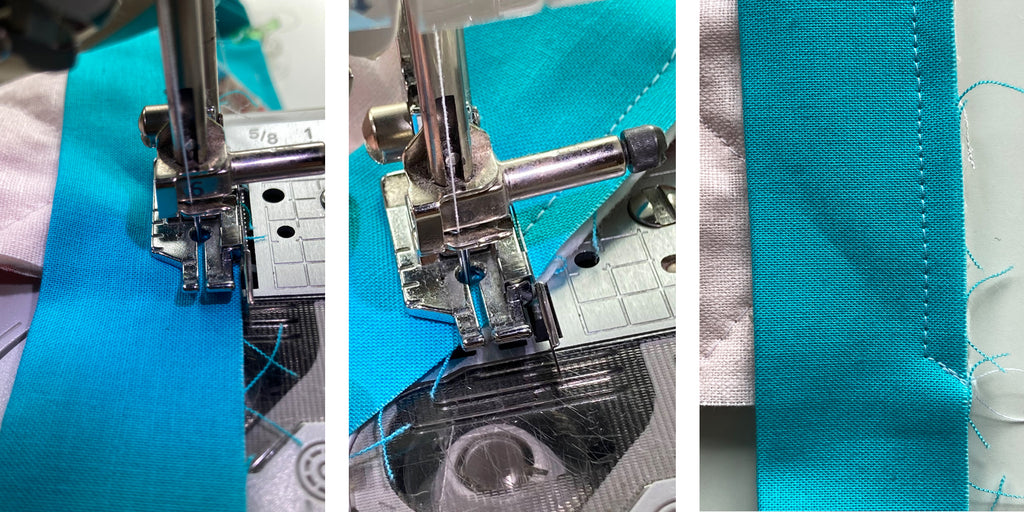
Step 9: Sew from starting point
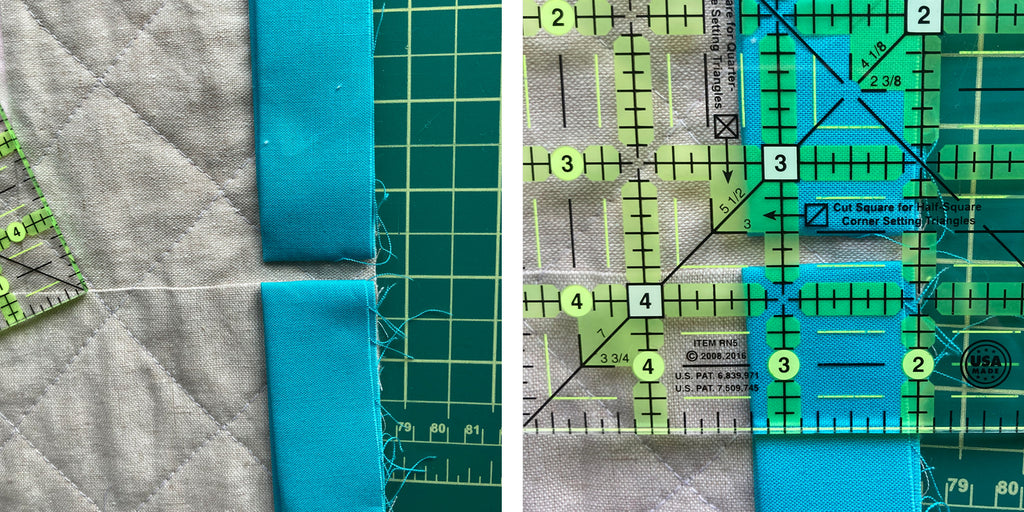
From your start point pin, sew a ¼” seam along the edge of your quilt. When you are ¼” away from a corner, stop sewing with your needle down to hold your position.
Step 10: Pivot!
Lift your presser foot and pivot your quilt 45 degrees so that the corner is pointing at you.
Step 11: Sew off the corner
Sew a couple stitches, then back-stitch, then sew all the way off the corner.
Steps 12 and 13 are shown in this photo:
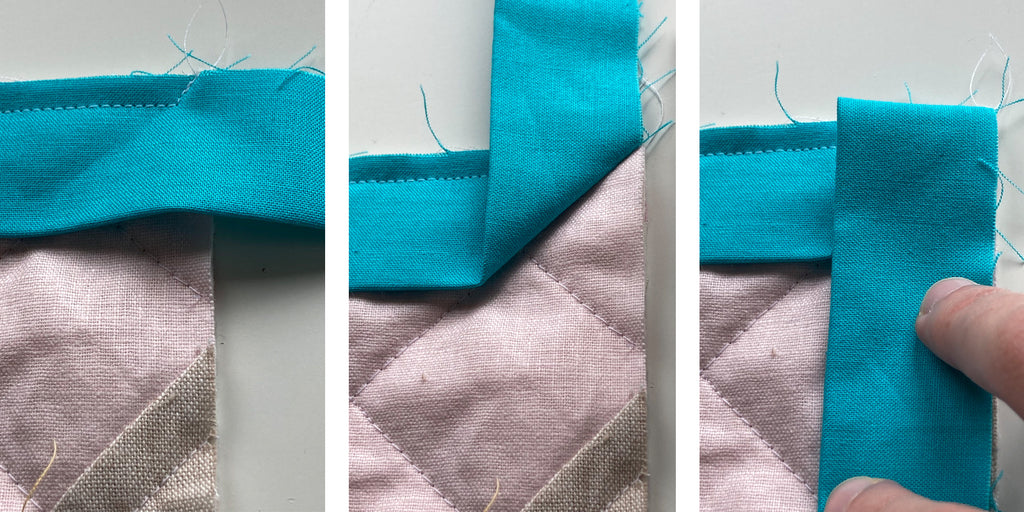
Step 12: Start the next side
Take your quilt off the machine, rotate so the next edge of the quilt to bind is on facing you, then flip the binding up and finger-press the crease.
Step 13: Flip then flop
Then, bring the binding down so it aligns with the raw edge of the next side of the quilt. One of my previous students in a workshop called this move “the flip flop”!
Put the quilt back on the machine, back-stitch, then continue stitching and pivoting your other corners.
Step 14: Joining strips
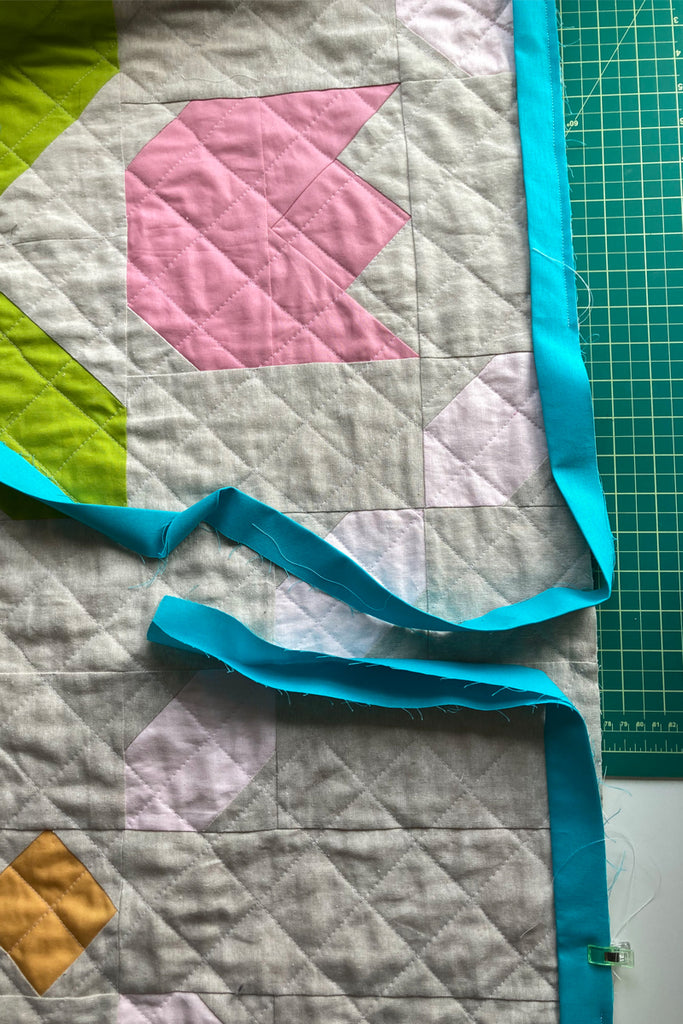
Stop sewing when you are about 18” away from your starting point. Leave a long tail (12”-18”).
Step 15: Create a gap
On a flat surface, arrange the binding so the ends overlap.
Fold the top piece up and the bottom piece down, so there is a ¼” gap in the middle. Finger press to make a sharp crease.
Step 16:"X" marks the seam
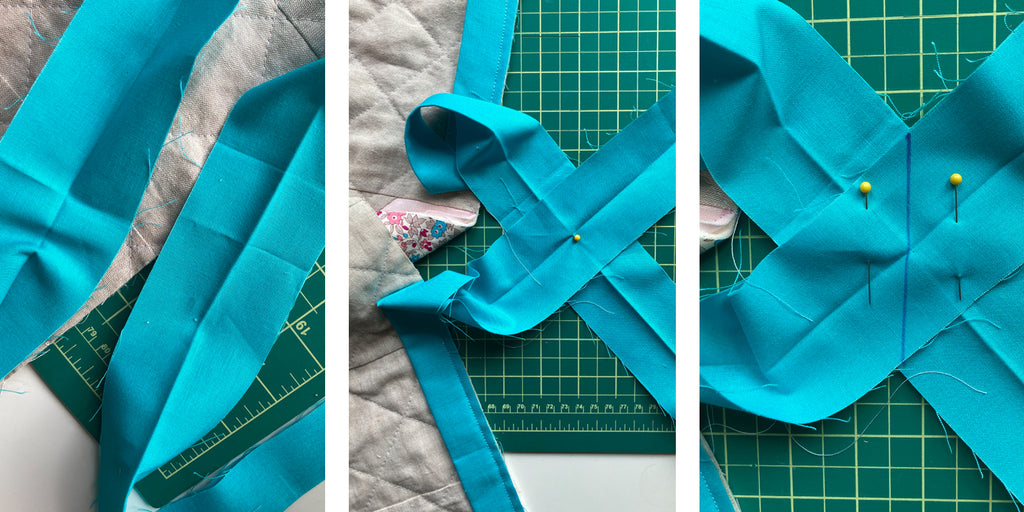
Open the binding so you can see an “X” marking the centre where you made the crease.
Place a pin through the centre of the wrong side of the bottom piece and the right side of the top piece./
With the binding pieces right sides together, pin in place, aligning the centre of each strip.
Draw a line down the centre and sew on the line.
Tip: this can be tricky, it helps to bunch up your quilt to get it out of your way.
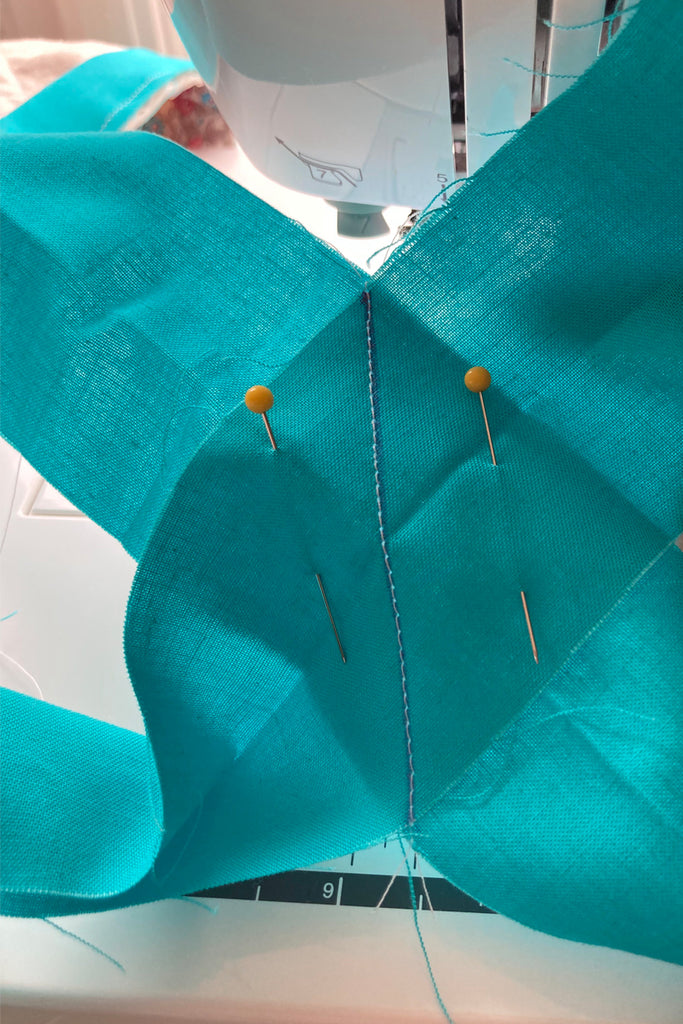
Step 17: Check your accuracy then trim
The tails of the binding should be pointing to the right.
Before pressing and trimming, test laying the quilt flat and make sure the binding will also lie flat.
Press the seam and trim to ¼”. Fold in half lengthwise and press so it matches the rest of the binding.
Step 18: Top stitching
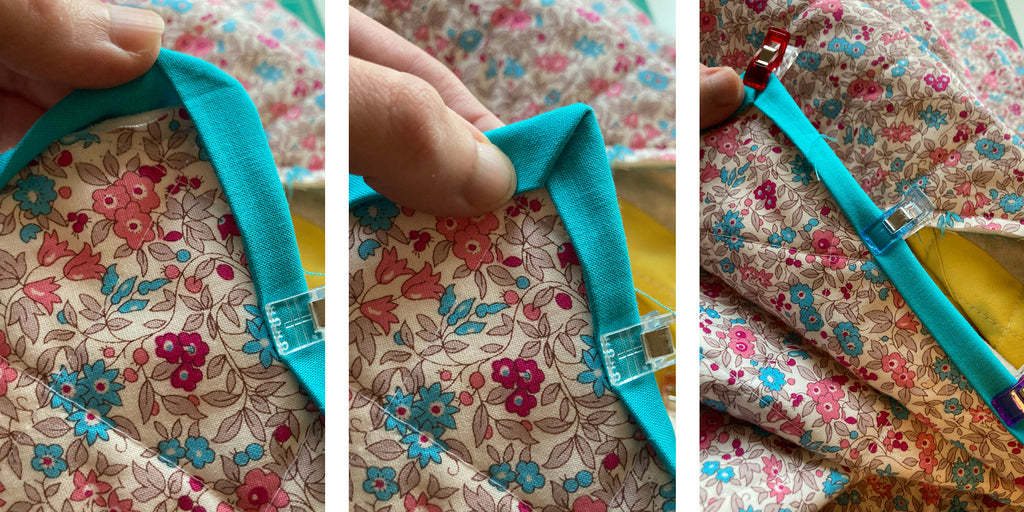
Flip your binding to the back of the quilt and use wonder clips to secure it (binder clips and clothespins also work). The binding on the back will be thicker than the front, so be mindful of thread colour. On this quilt I used blue thread on top with white bobbin thread. This way, the white thread blends in with the quilting on the front. Sew around the perimeter or the binding as close to the edge as you can. When you reach a corner, fold the top down, and bottom up to make a neat 45 degree corner.
Step 19: Finish it off!
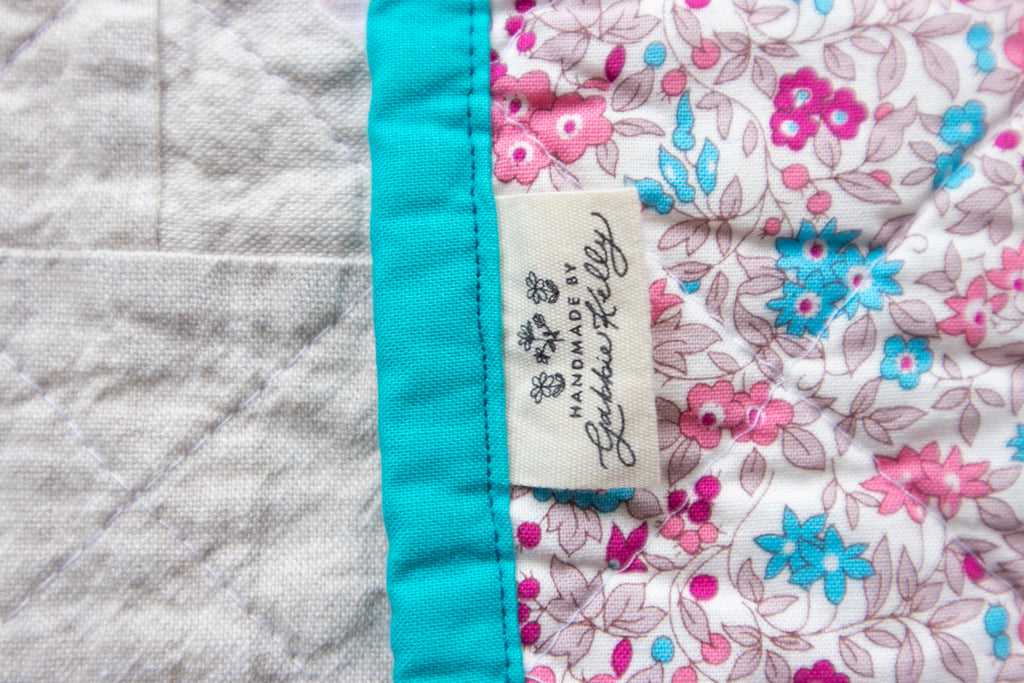
When you’ve gone all the way around, you can back stitch or leave your threads long, tie them off and then bury them in the quilt. If you have a tag for your handmade quilt, tuck it in underneath the binding during the top stitching.
And we’re done! It is a multi-step and time consuming process and it is SO worth it.